Testia, an Airbus Company, stays true to its values by constantly creating synergies with aerospace actors in order to deliver integrated value solutions to end customers. This approach leads to the development of extended capabilities on current high-end products; that is the case of ThicknessTool, a thickness mapping device with the capability of inspecting large blended-out areas twenty times faster than regular point-to-point inspection.
Smart investments are the answer to face the new challenges to come in 2021. The harsh economic context will push aerospace operators and maintainers to re-think their ways of creating value, gain competitiveness and ramp-up their operations. The new normal for the business is to pay attention on details: this operations-focused approach reveals the importance of effective savings that can be scalable from one inspection to another, from one aircraft to another and from one fleet to another.
This new normal is reachable and becomes a smart investment when scalability is guaranteed by a solution that remains repeatable, reproducible and accurate at all levels of escalation.
ThicknessTool is the new normal: Key is on details
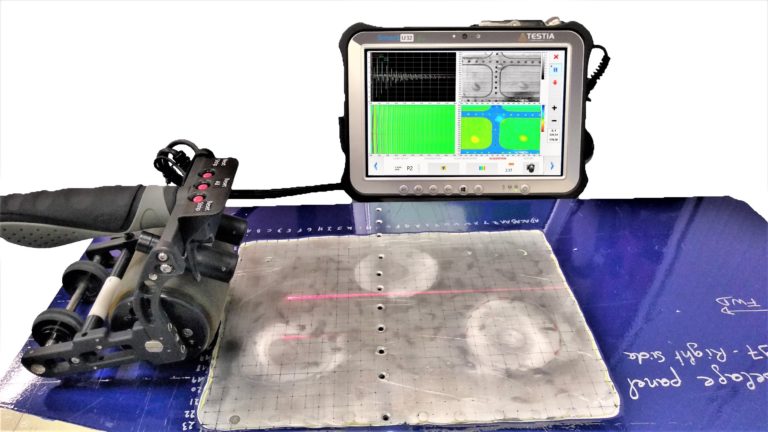
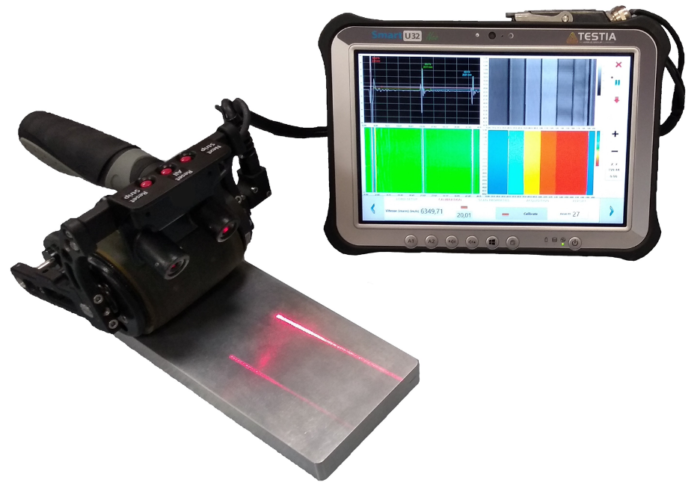
The device is conceived as an aerospace dedicated solution for rapid and reliable thickness assessment of large structure that encompass a multi-element UT instrument, a 32-element roller probe together with dedicated acquisition and automatic analysis software.
The ThicknessTool has increased its effective operational range from 20 mm down to 0.6 mm, which makes it capable of performing on practically every aircraft aluminum skin thickness from fuselage to wings. This broad application range is the perfect complement for its fast acquisition rhythm that allows operators to cover large blended-out areas of squared meters in minutes by a ratio of 1m² every 5 minutes on average.
The traditional process for the thickness measurement after blending requires point-to-point single element measurement, distributed on a 10 by 10 mm grid.
Often this procedure requires sub-steps like:
- Marking the inspection area with the grid (this also should be cleaned-up at the end of the process);
- Acquiring the measurements and writing them down on paper (to be later formally reported again);
- Taking pictures of the inspected area as visual support for reporting (taken with personal mobile phone camera);
All of these activities represent 3 hours’ worth of work for 2 inspectors to cover an area of 20 by 30 cm equivalent of a laptop dimension. This means that such inspection takes 6 man-hours whereas the regular work-shift is 8 hours. Thanks to ThicknessTool operators can forget about all of this and concentrate on what matters: reliability, accuracy, quality and simplicity.

The Features – Accuracy and speed on the same sentence as new normal
Merging these two concepts is an accessible reality to accomplish first time right inspections. The features of the ThicknessTool guides the operator during the whole inspection process until the final delivery of the report, relieving them of repetitive tasks to keep their attention on the inspection.
- Assisted, fail-proof step-by-step calibration process
- Customer orientated interface for simplified data reading
- One click pre-set configuration for different specific parameters
- Guided step-by-step data acquisition process
- Adapted for wings and fuselage curved skin
- Standard and high-resolution grid options
- Laser guiding system
- A, B and C-Scan real-time visualization
- Automatic report generation
- C-Scan, measurements grid and pictures included on report by default
- Meets aerospace specific requirements
- Avoid dual entries and human errors
- Remote assistance ready (if needed)
These features among others are the enablers of digital data continuity between the ThicknessTool and other Testia platforms to provide accurate inspection towards a local and global traceability of inspection activities all across fleets.
Proved on-field capabilities by top professionals
Lufthansa Technik approached Testia to provide them with a solution enabling to perform measurement of remaining thickness in large blended out area of aluminium alloy sheet and plate according to the Airbus NTM 51-10-04. They needed an efficient solution that would enable them to identify features such as rivets and edges, provide accurate thickness measurement in both imperial and metrics, give instant reading against simple color-coded data and generate a complete sentenced report.
Testia as for all its customer worked intimately with them to push the limits of its solution even further. Indeed, Testia developed an ultra-high resolution grid mapping (0.8 by 0.8mm) and incorporated new views to help with feature discrimination. A graphical overlay was also implemented to better correlate the thickness mapping with manual UT measurements. Finally, other features were added to make the inspection even simpler, such as: quick access to the instrument’s camera for automatic import in the report, coloured coded Excel report with letters and numbers indexing instead of coordinates and systematic data recorded.
Lufthansa Technik put the solution to the test directly and while experiencing the benefit of all those development during inspection, they were amazed by the simplicity and the rapidity to obtain reliable and exploitable report:
Gavin Mc Gibney, Senior NDT Engineer at Lufthansa Technik says: “The ThicknessTool is a great piece of kit, ready to use with setup already loaded. The man hour savings are incredible: 384 mins with conventional UT versus 7 mins with the ThicknessTool = 98% efficiency!”


